Fire Pits & Outdoor Living in the Treasure Valley
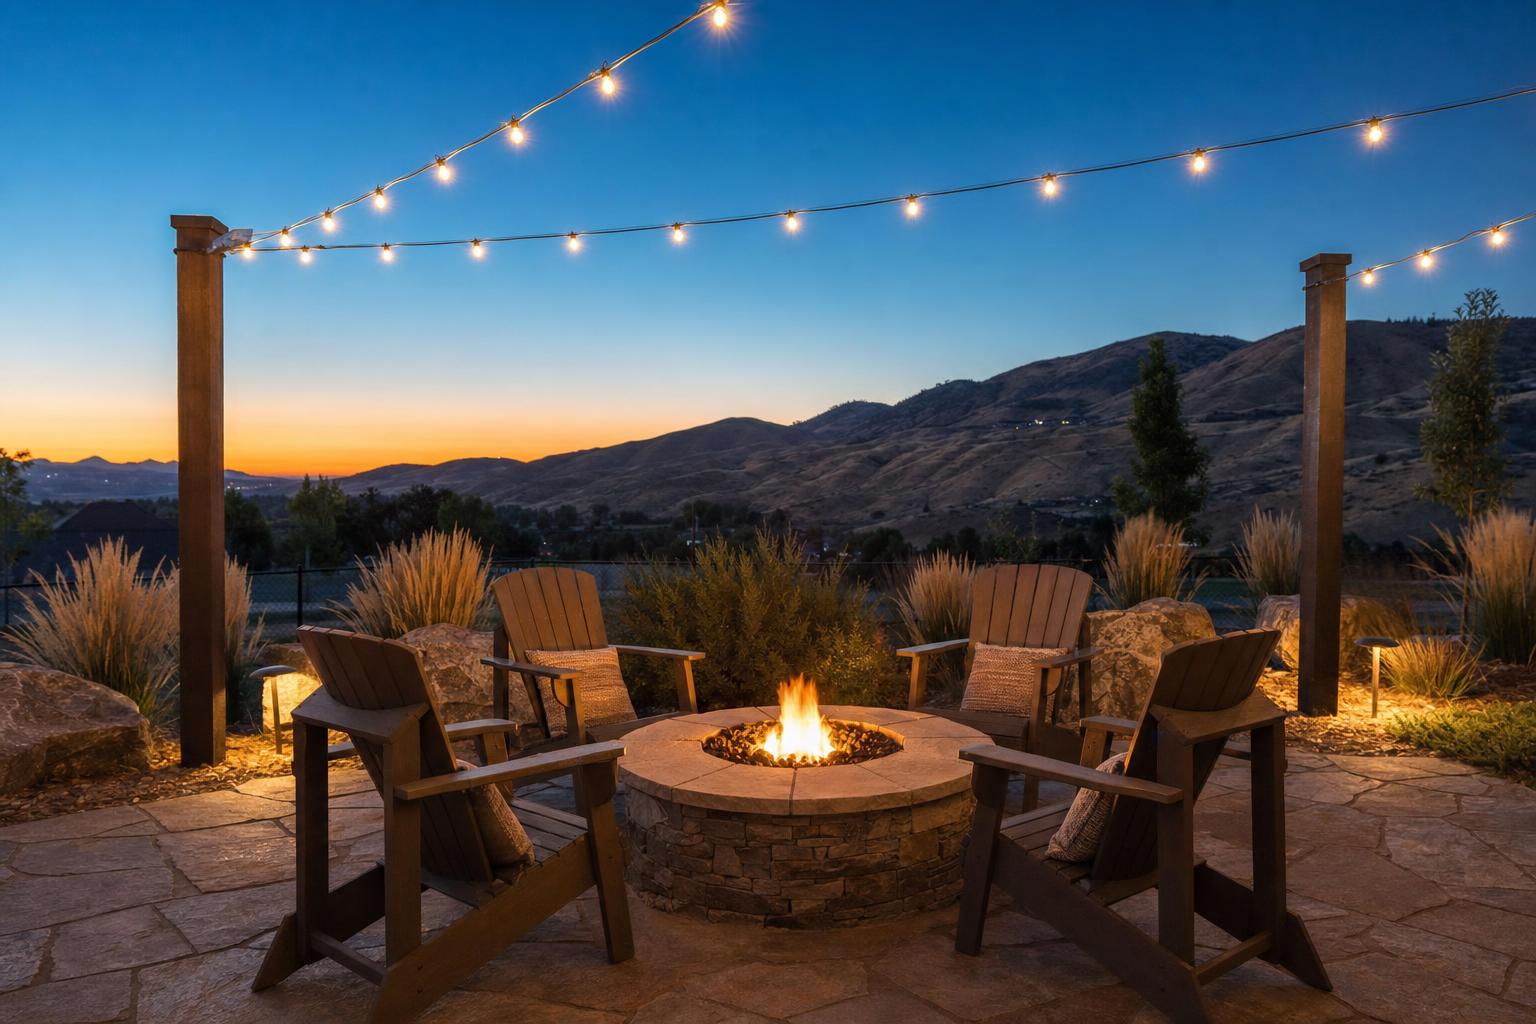
Treasure Valley summers are made for outdoor living. July highs reach 92°F but evenings cool into the low 60s — perfect fire pit weather. This guide covers everything from Boise's open burning regulations and fire pit sizing to pergola design, outdoor kitchen costs, and the materials that survive Idaho's freeze-thaw cycles.
An outdoor living space is not just a patio with a grill. It is an extension of your home — a place to cook, gather, relax, and extend your usable season from March through November. In the Treasure Valley, where summer days are hot and dry but evenings are comfortably cool, a well-designed outdoor room can become the most-used space in your house. Whether you are starting from bare dirt in a Meridian subdivision or upgrading an existing patio in Boise's North End, this guide walks you through the decisions that matter.
Why the Treasure Valley is perfect for outdoor living
The same high-desert climate that makes irrigation essential makes outdoor living delightful. Here is what makes our region unique:
- Large diurnal temperature swings: Even on a 95°F July afternoon, Boise nights drop to 62°F — comfortable for sitting outside with a fire or under a pergola.
- Low humidity: Summer relative humidity averages 20–30%, so evenings feel cool and refreshing rather than sticky. No mosquitoes at dusk like the Midwest or South.
- Long shoulder seasons: Spring (April–May) and fall (September–October) offer weeks of ideal outdoor dining weather. A fire pit extends your season into November.
- Low rainfall in summer: Boise receives less than half an inch of rain in July and August combined. You can plan outdoor gatherings without worrying about rain — though afternoon thunderstorms do roll through periodically.
- Dark skies: Away from downtown Boise, the Treasure Valley offers excellent stargazing. A fire pit area oriented away from street lights becomes a nighttime destination.
The 100-degree reality: July and August regularly see stretches of 100°F+ days. Plan shade structures (pergolas, shade sails, or mature trees) to make your outdoor space usable during afternoon hours. Fire pits and outdoor kitchens get the most use in the evening when temperatures drop — position them where you can enjoy the transition from hot day to cool night.
Fire pit types: choosing the right one for your yard
The first decision is fuel type. Each has trade-offs for convenience, ambiance, cost, and regulatory compliance.
Wood-burning fire pits
The classic choice — crackling fire, wood smoke, and the highest heat output. Wood-burning pits range from simple DIY ring kits to custom stone fire bowls with built-in seating walls.
- Cost: $200 for a portable steel bowl; $800–$2,500 for a custom built-in stone or block fire pit with seating wall
- Fuel: Seasoned firewood only — never burn yard debris, treated lumber, pallets, or garbage (illegal under Boise City Code 5-12)
- Pros: Highest heat, authentic crackle and aroma, lowest fuel cost if you have your own wood source
- Cons: Subject to air quality restrictions, ash cleanup, wood storage needed, smoke can bother neighbors
Gas fire pits (natural gas or propane)
Push-button convenience with a real flame. Gas fire pits use a burner ring beneath fire glass, lava rock, or ceramic logs. Natural gas requires a permanent gas line; propane uses a standard 20-lb tank housed inside the pit base.
- Cost: $1,500–$7,000 installed (natural gas with line run); $800–$3,500 (propane)
- Fuel: Natural gas (piped) or propane (tank exchange/refill, ~$20–$30 per tank)
- Pros: Instant on/off, no smoke, no ash, not affected by air quality burn bans, adjustable flame height, usable during AQI restrictions
- Cons: Lower heat than wood, requires gas line installation (natural gas), tank refills (propane), higher upfront cost
Fire tables and linear burners
A modern, lower-profile alternative to traditional fire pits. Fire tables combine a gas burner with a functional surface — think a coffee table with a flame strip down the center. Ideal for lounge seating areas and contemporary patio designs.
- Cost: $1,200–$5,000 installed
- Best for: Modern patio designs, dining-adjacent seating areas, spaces where a traditional fire pit feels too rustic
- Pros: Dual function (surface + fire), clean aesthetic, wind-resistant, works with outdoor sectionals
- Cons: Lower heat output, fuel limited to gas, burner components need periodic maintenance
| Type | Cost (installed) | Heat output | Burn ban exempt? | Maintenance |
|---|---|---|---|---|
| Portable wood-burning bowl | $200–$600 | High | No | Ash cleanup, cover when not in use |
| Custom stone wood-burning pit | $800–$2,500 | High | No | Periodic ash removal, stone sealing |
| Natural gas fire pit | $1,500–$7,000 | Medium | Yes | Annual burner inspection, clean fire media |
| Propane fire pit | $800–$3,500 | Medium | Yes | Tank refills, annual burner check |
| Fire table (gas) | $1,200–$5,000 | Low–medium | Yes | Cover when not in use, clean burner |
Boise & Treasure Valley fire pit regulations
Before you build or install a fire pit, you need to understand the local rules. The Boise Fire Department enforces open burning regulations under Boise City Code 5-12, and the Idaho Department of Environmental Quality (DEQ) monitors air quality across the valley.
What is allowed without a permit
Recreational fires and portable outdoor fireplaces do not require a permit in most areas, provided they meet all of the following conditions:
- Fuel area of 3 feet or less in diameter and 2 feet or less in height
- Only firewood is burned — no yard debris, garbage, treated wood, or leaves
- 25 feet separation from structures and combustible materials for recreational fires
- 15 feet separation for approved portable outdoor fireplaces (enclosed containers)
- Constantly attended until the fire is fully extinguished
- Extinguishing equipment must be readily available (garden hose, fire extinguisher with minimum 4-A rating, or dirt/sand)
Air quality restrictions
All open burning — including recreational fires — is prohibited when the Air Quality Index (AQI) reaches 60 or higher for any pollutant, as reported by Idaho DEQ. This is a lower threshold than the EPA's "unhealthy" categories, so wood fires can be restricted even on days that feel clear. Check current conditions at Idaho DEQ's "Can I Burn?" page before lighting a wood fire.
Gas fire pits are exempt from AQI burn bans. Because gas fire features do not produce particulate smoke, they are not classified as "open burning" and can be used regardless of air quality conditions. If you want a fire pit you can use any evening — including during winter inversion season — choose natural gas or propane. This is a significant advantage for year-round use in the Treasure Valley, where winter inversions can trigger AQI restrictions for weeks at a time.
Foothills and Wildland-Urban Interface (WUI) zones
If your home is in or near the Boise Foothills, Garden City foothills, or other designated Wildland-Urban Interface areas (Boise City Code 5-12-49), outdoor fire rules are much stricter:
- No open burning of any kind without written permission from the Fire Marshal
- Exceptions: Enclosed outdoor fireplaces, incinerators, or grills — but they must be at least 30 feet from any combustible material or non-fire-resistive vegetation, with spark arrestors on all openings
- Propane-fired portable fireplaces are allowed within 15 feet of combustibles (same as flatland areas)
If you live in the Foothills — areas like Harris Ranch, Quail Ridge, the Ridge to Valley corridor, or any home adjacent to open sagebrush land — a gas fire pit is strongly recommended over wood. The fire risk is real, and restrictions on wood fires are enforced.
Unincorporated Ada County
In unincorporated areas of Ada County (rural areas outside city limits), open burning rules are slightly different. Agricultural and irrigation ditch burning is allowed when AQI is below 60, but the same recreational fire size limits apply. Always verify your address's jurisdiction — some properties near city limits fall under city fire codes despite having a county mailing address.
Fire pit design and placement
Sizing the fire pit area
The most common design mistake is undersizing the space around the fire pit. You need room for seating, circulation behind chairs, and a clear path back to the house or kitchen. A fire pit itself may be 36–44 inches in diameter, but the patio around it should be much larger:
| Fire pit size | Minimum patio size | Seating capacity | Recommended clearance |
|---|---|---|---|
| 36-inch diameter | 12 × 12 ft | 4–5 people | 8 ft from seating edge to patio edge |
| 42-inch diameter | 14 × 14 ft | 6–8 people | 8 ft from seating edge to patio edge |
| 48-inch diameter + seat wall | 16 × 16 ft | 8–10 people | 10 ft from seat wall to patio edge |
Placement considerations
- Wind: Note prevailing winds in your yard. The Treasure Valley's afternoon winds typically come from the northwest. Place seating upwind of the fire pit so smoke blows away from guests.
- Sightlines: Position the fire pit where it is visible from indoor living spaces — a fire visible through a sliding glass door extends the feeling of your outdoor room even when you are inside.
- Privacy: Use the fire pit area as an opportunity to create privacy with low walls, ornamental grasses, or strategically placed shrubs. Panicum virgatum (switchgrass) and Miscanthus species grow 4–6 feet tall and create beautiful translucent screens that catch firelight.
- Utilities: For gas fire pits, plan the gas line route before pouring any patio base. Trenching under an existing patio costs significantly more than running a line during construction.
- Drainage: Slope the fire pit patio 1–2% away from the fire pit center so water does not pool in or around the fire bowl. In freeze-thaw conditions, standing water under a fire pit can heave the base.
Materials that survive Idaho's freeze-thaw
The Treasure Valley experiences 30–50 freeze-thaw cycles each winter — days where temperatures cross 32°F in both directions. Materials that absorb water and then freeze will crack, spall, and deteriorate. Here is what works and what does not:
Fire pit structure (outer wall)
| Material | Cost | Freeze-thaw durability | Notes |
|---|---|---|---|
| Segmental retaining wall block (e.g., Belgard, Pavestone) | $12–$20 per block face sq ft | Excellent — engineered for freeze-thaw | Most popular choice; available in multiple colors and textures |
| Natural basalt stone | $25–$45 per sq ft | Excellent — dense, non-absorbent | Local Idaho basalt; dark gray/black; rustic aesthetic |
| Poured concrete with stone veneer | $30–$55 per sq ft | Excellent when properly sealed | Custom shapes possible; requires skilled mason |
| Fieldstone / river rock | $15–$30 per sq ft | Variable — depends on stone density | Natural look; avoid porous sandstone varieties |
| Brick (clay paver) | $20–$35 per sq ft | Good — but moisture can enter mortar joints | Traditional look; requires tuck-pointing every 10–15 years |
Fire pit interior (firebox)
The inner firebox takes the most thermal abuse. For wood-burning pits, use heat-rated fire brick (refactory brick rated to 1,200°F+) for the inner wall. Standard concrete block will deteriorate rapidly under direct flame. A steel fire ring insert ($150–$400) between the fire brick and outer stone protects the structure from direct flame contact and extends the life of the fire pit significantly.
Fire pit cap (seating edge)
The cap is the flat top surface where people rest drinks or lean. Choose a material that stays cool enough to touch:
- Precast concrete caps: $15–$30 per linear foot. Clean, modern, stays relatively cool. Available in buff, gray, and charcoal.
- Bluestone caps: $25–$45 per linear foot. Natural stone, elegant, good thermal mass but can get warm near the flame.
- Granite caps: $35–$60 per linear foot. Extremely durable, non-porous, premium appearance.
- Avoid: Limestone and sandstone — they absorb moisture, spall in freeze-thaw, and can crack from thermal shock.
Why pavers beat poured concrete in Idaho: Paver patios handle freeze-thaw cycles without cracking because individual units can shift slightly and settle back. If a paver settles or stains, you replace that unit — not the entire slab. The gaps between pavers allow water to drain, reducing ice buildup. A properly installed paver patio with compacted base, edge restraints, and polymeric sand joints lasts 40+ years with minimal maintenance. Poured concrete, by contrast, will crack in the Treasure Valley within 5–10 years unless heavily reinforced and jointed.
Pergolas and shade structures
Shade is essential for making outdoor spaces usable during Treasure Valley afternoons. A pergola defines an outdoor room, provides partial shade, and creates a structure for string lights, ceiling fans, and climbing plants.
Pergola types and costs
| Type | Cost (installed) | Shade level | Best for |
|---|---|---|---|
| Wood pergola (cedar or pressure-treated) | $3,000–$8,000 | 30–50% (slatted top) | Traditional look, climbing plants, string lights |
| Vinyl/PVC pergola | $4,000–$10,000 | 30–50% (slatted) | Low maintenance, no painting or staining |
| Aluminum pergola (fixed slats) | $5,000–$12,000 | 30–60% | Modern aesthetic, minimal maintenance |
| Louvered pergola (adjustable, motorized) | $15,000–$35,000 | 0–100% (adjustable) | Full shade when needed, open for stargazing, rain sensors |
| Shade sail (fabric tension canopy) | $800–$3,000 | 70–90% | Budget shade, modern look, removable for winter |
Climbing plants for pergolas
A pergola with climbing plants creates living shade that increases through the season. Good Treasure Valley choices:
- Grape (Vitis labrusca 'Concord' or Vitis vinifera): Fast-growing, edible fruit, full shade by mid-summer. Prune hard in late winter.
- Honeysuckle (Lonicera sempervirens): Tubular red flowers attract hummingbirds. Semi-evergreen in mild winters. Plant on east or north side.
- Clematis (Clematis spp.): Large showy flowers in purple, pink, or white. Prefers roots in shade, tops in sun. 'Jackmanii' is reliable in Boise.
- Hops (Humulus lupulus): Fast annual growth to 20+ feet, dies back to ground each winter. Great for quick shade on a new pergola.
- Avoid: English ivy (Hedera helix) — it can damage wood structures and is invasive in riparian areas.
Outdoor kitchens: from basic to full build
An outdoor kitchen turns a patio into a cooking and entertaining destination. The cost range is wide — from a simple built-in grill island to a full outdoor kitchen with refrigerator, sink, pizza oven, and bar seating.
Cost tiers
| Tier | Cost range | What you get |
|---|---|---|
| Basic grill island | $5,000–$8,000 | Built-in gas grill, small counter, base storage. Pre-fabricated island on a paver pad. |
| Mid-range outdoor kitchen | $15,000–$25,000 | Built-in grill, side burner, refrigerator, counter space for prep, bar seating for 3–4, pergola overhead |
| High-end outdoor kitchen | $25,000–$50,000 | Premium grill (e.g., Blaze, Hestan, Lynx), pizza oven, sink with running water, refrigerator, ice maker, bar seating for 6+, custom stone counters, integrated lighting |
| Luxury outdoor living | $50,000–$100,000+ | Full kitchen, fireplace, fire pit, dining area, lounge area, outdoor TV, sound system, heaters, custom pergola with motorized louvers, water feature |
Countertop materials for outdoor kitchens
| Material | Cost per sq ft | Weather resistance | Notes |
|---|---|---|---|
| Granite | $70–$110 | Excellent | Natural stone, non-porous when sealed, heat-resistant, premium look |
| Concrete (cast in place) | $60–$85 | Good with sealer | Custom shapes and colors; needs resealing every 2–3 years |
| Bluestone | $60–$85 | Good | Natural stone, classic look, can develop patina over time |
| Stainless steel | $100–$150 | Excellent | Matches grills, industrial look, hot to touch in direct sun |
| Tile over concrete board | $30–$60 | Good | Budget-friendly; porcelain tile with epoxy grout handles weather well |
What to include — and what to skip
Not every outdoor kitchen needs a sink and a refrigerator. Here is how to prioritize based on how you cook and entertain:
- Always include: A quality built-in gas grill ($1,500–$5,000), adequate counter space on both sides of the grill (minimum 18 inches each side), and task lighting for evening cooking.
- Include if you entertain frequently: A refrigerator ($800–$2,000 outdoor-rated) for drinks and condiments, and a side burner ($300–$600) for boiling corn or heating sauces.
- Include if you love pizza: A wood-fired or gas pizza oven ($2,000–$8,000). Ooni and Gozney make excellent residential models. A pizza oven also serves as a secondary fire feature for evening ambiance.
- Skip if your indoor kitchen is nearby: A sink — outdoor sinks require plumbing, inspection, and winterization. If your patio is within 30 feet of the back door, walk inside to wash.
- Skip unless you are building luxury: Ice maker, kegerator, outdoor TV, sound system. These add cost and maintenance complexity.
Plan utilities before the patio goes in: Running gas, water, and electrical lines under an existing patio requires trenching through pavers — expensive and disruptive. If you think you might add an outdoor kitchen in the future, run conduit (empty pipe) from the house to a central point in the patio area during initial construction. This costs $200–$500 during new construction vs $2,000+ to retrofit.
Lighting for outdoor living spaces
Lighting is what makes an outdoor space feel finished. Without it, your fire pit area is invisible after sunset except for the fire itself. A layered lighting approach creates depth and usability:
Three layers of outdoor lighting
- Ambient (string lights): Edison-style string lights suspended between pergola posts, trees, or poles create warm, inviting overhead light. Use LED bulbs (2W each) on a timer. Solar-powered options work well for locations far from an outlet. $100–$400 installed.
- Task (grill and prep lighting): Low-voltage under-counter LED strips or a dedicated grill light ensure you can see what you are cooking. $100–$300 installed.
- Accent (path and landscape): Low-voltage path lights along walkways (for safety), uplights on trees or architectural features (for drama), and downlights in tree canons (for moonlight effect). A 6-light kit with transformer costs $300–$800 installed.
Use a low-voltage transformer with a photocell and astronomic timer so lights turn on automatically at dusk and off at a set time (typically 10 or 11 PM). Brands like Kichler, Hinkley, and Volt offer outdoor-rated fixtures that survive Idaho winters. Expect to spend $500–$1,500 for a complete low-voltage landscape lighting system on a typical patio.
The outdoor living budget breakdown
For a typical Treasure Valley backyard project (patio + fire pit + pergola + lighting), here is what you can expect to invest:
| Project scope | Cost range | Typical timeline | Best for |
|---|---|---|---|
| Patio + portable fire pit + string lights | $5,000–$12,000 | 1–2 weeks | First outdoor space on a budget |
| Paver patio + gas fire pit + pergola + lighting | $15,000–$35,000 | 2–4 weeks | Most popular — usable April through November |
| Patio + fire pit + pergola + outdoor kitchen | $25,000–$60,000 | 4–8 weeks | Frequent entertainers |
| Full outdoor living (kitchen, fire, pergola, lighting, seating walls, water feature) | $60,000–$120,000+ | 8–16 weeks | Luxury backyard transformation |
Seasonal use calendar for outdoor living
March–April
Cool evenings (40s–50s). Fire pit season begins. Clean patio furniture, check gas lines, refill propane tanks. Pergola shade not yet needed.
May–June
Evenings in the 60s–70s. Ideal outdoor dining weather. Pergola vines leaf out. String lights get maximum use. Schedule patio installation — this is the best construction window.
July–August
Hottest months (95°F+ afternoons, 60s evenings). Use shade structures during the day, fire pits after sunset. Gas fire pits usable even during AQI restrictions. Outdoor kitchens at peak use.
September–October
The best outdoor living months. Afternoon highs in the 70s–80s, evenings in the 50s. Fire pits and fireplaces essential. Fall color from ornamental grasses and late-blooming perennials. Winterize gas lines and irrigation before November.
November–February
Winter. Gas fire pits and fireplaces extend use on mild evenings (40s+). Wood fires restricted during inversions (AQI 60+). Cover furniture, drain outdoor kitchen water lines, store cushions indoors. Use the patio on sunny winter afternoons when temps reach 40s.
Year-round tips
Gas fire features work in all seasons. Keep patio furniture covers handy. Install a patio heater ($150–$500 freestanding, $1,000–$3,000 mounted) to extend shoulder season use. Store propane tanks upright and protected from snow.
Hiring a professional vs. DIY
| Project | DIY-friendly? | When to hire |
|---|---|---|
| Portable fire pit on existing patio | Yes | — |
| Paver patio installation | Possible for small patios | Large patios, slopes, or when base prep needs heavy equipment |
| Custom stone fire pit (wood-burning) | Yes with a kit | Custom stonework or integrated seat walls |
| Gas fire pit installation | No — gas line work requires a licensed professional | Always hire for gas line installation and connection |
| Pergola construction | Yes for kits | Custom designs, attached to house, or requiring footings |
| Outdoor kitchen | Not recommended | Always hire — involves gas, electrical, plumbing, and masonry |
| Low-voltage landscape lighting | Yes | Complex multi-zone systems or tree-mounted fixtures |
For a curated list of local professionals who design and build outdoor living spaces, see our Landscapers of the Treasure Valley directory. Companies like Northwest Hardscape Specialties (Belgard Master Craftsman) and New Life Landscape (Belgard Master Craftsman, pool and patio specialist) are particularly well-suited for fire pit and outdoor kitchen projects.
Putting it all together
A well-designed outdoor living space is the most rewarding landscape investment you can make in the Treasure Valley. The climate — hot days, cool evenings, low humidity, long shoulder seasons — is ideal for outdoor rooms that get used 7–9 months of the year. Here is the priority order for a typical project:
- Start with the patio. A properly installed paver patio is the foundation. Size it for furniture and circulation — not just the fire pit.
- Choose your fire feature. Gas if you want year-round, any-weather use. Wood if you want the classic experience and live outside the WUI zone.
- Add shade. A pergola or shade sail makes the space usable during afternoon hours. Plan for it during patio construction so footings are in place.
- Layer in lighting. String lights for ambiance, path lights for safety, accent lights for drama. A $500–$1,500 investment transforms the space after dark.
- Add the kitchen last. If budget allows, a built-in grill island or full outdoor kitchen completes the space. Run utilities during patio construction to save thousands later.
Build these in order and you will have an outdoor space that grows with your budget and becomes the center of your home's social life — not just a place you use on the Fourth of July, but a space you step into every evening from spring through fall.